Add A Page
A page is the most widely used item in Plone for presenting text and images. The page can be designed using the visual editors listed above as Icons. TinyMCE is the visual editor that comes with Plone.
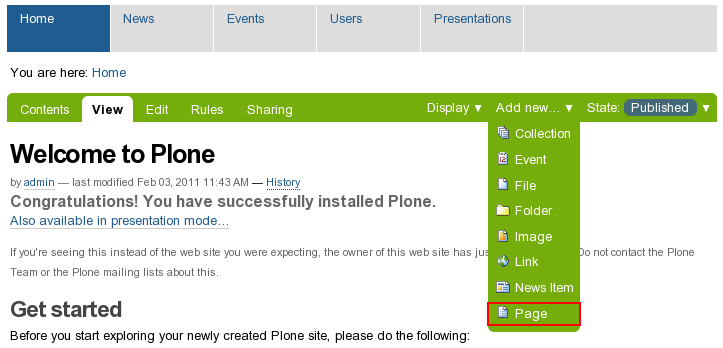
To create a page, click "Add new.." and select Page from the dropdown menu.

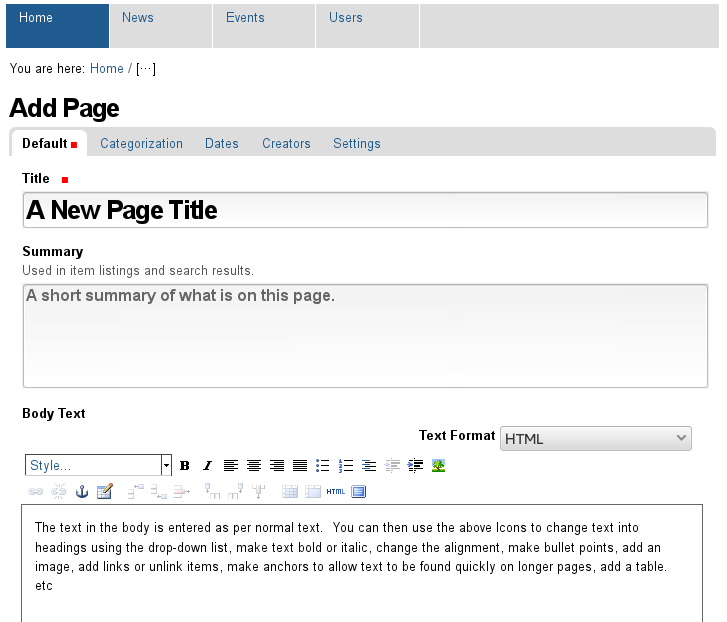
In the opened Add Page screen - fill in the Title (this a required field, indicated by the red square).
The Summary field is not obligatory, but you should fill it in with a short description of the page contents. This text is used when listing available items and by the search function.
The biggest field Body Text should be used for entering the main page text. Plone's visual editor - TinyMCE - makes it easy to do basic page styling and layout, since it displays the text in the same way as it is displayed on page view. TinyMCE enables easy text formatting, insertion of links, images, tables and many more features. Everything can be done as easily as in any other word processor, like MS Word. Some features are not added by default but can be added on request, e.g. underline styling for words, page divider lines, cut/paste from word documents etc.

Change Note:
The change note appears above most items when adding or editing. Entering a comment as to your change can be very useful when others need to know why a change was made.

Related Items:
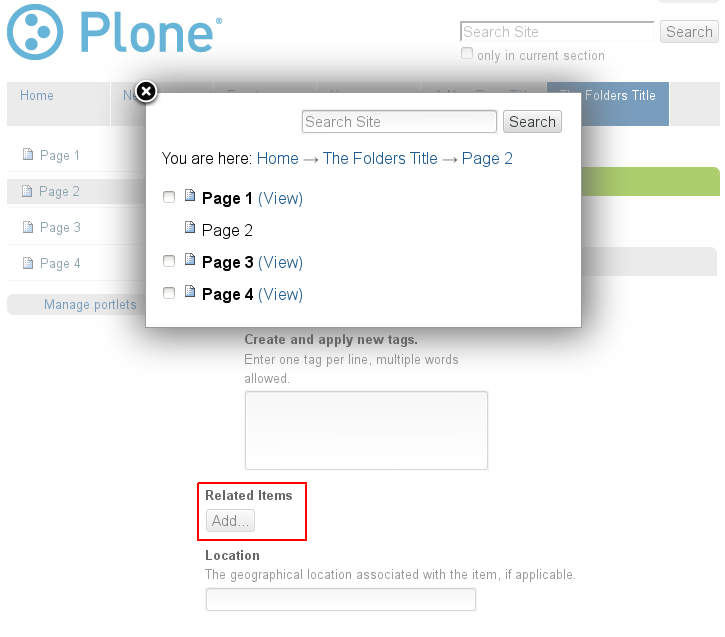
Every page can have a list of items within the site that relate to it. Setting such pages allows readers to easily find similar content which may interest them. To set related items - click on the Categorization tab in the grey bar under the main title. Click the 'Add...' button found under the heading 'Related Items'.

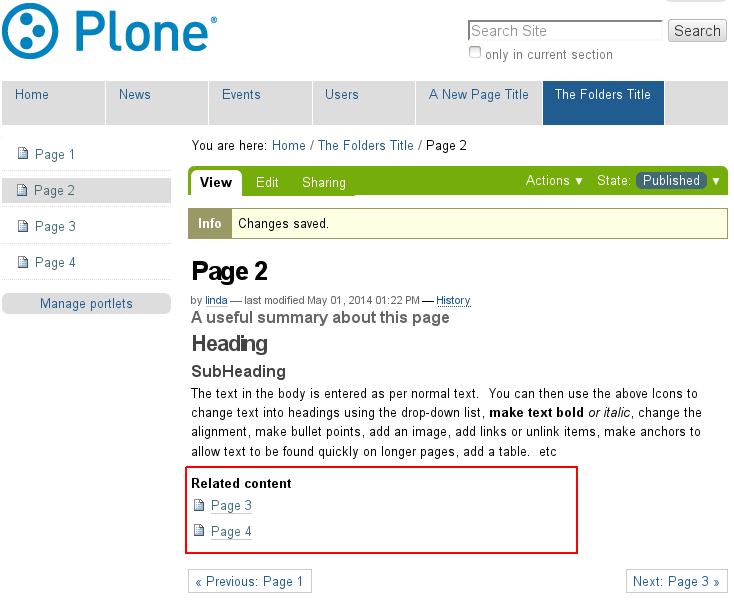
In the pop-up window, 'tick' the related item(s). You can select as many as you like, click 'Home' if you need to go back to a different folder for more items. Click the 'Save' button to add the items from each pop-up window before continuing to a new area for more items. The related items will appear on your page under the main body text.

